As I have been dabbling in machine learning, I decided to build a GPU machine. Over the weekend, I built one for myself. I wanted to share the details with others so that they can make the right choices.
A key part of machine learning is to do lot of mathematical computations. As
you are training the neural network, you need to do large number of matrix
multiplications. In fact, almost all the computations are on matrices -- these
transformations are similar in nature to graphics. Say you want to tilt an
image? Lighten or darken an image? All of it is matrix operations. Graphics
cards (Graphics Processing Unit of GPU) excel in these computations.
So, I wanted to build a high end GPU machine for as little money as possible.
Getting the parts
The challenge with getting the parts is how do you know which parts work
together? How do you know what all you need? Thankfully,
www.pcpartpicker.com will come to the rescue
(there are some limitations, which I will describe later). If you are
impatient, here is my list:
PCPartPicker part list / Price
breakdown by merchant
| Type | Item | Price |
|---|---|---|
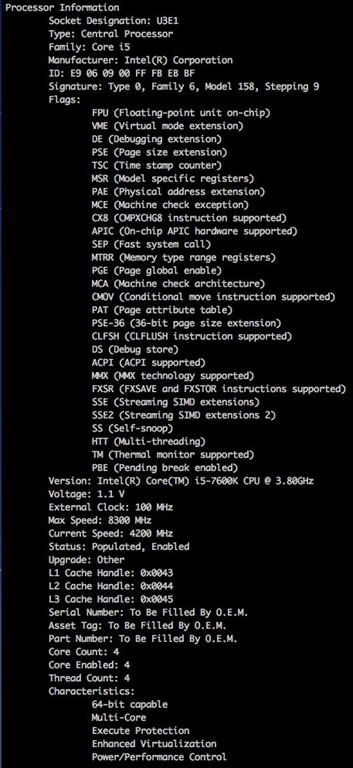
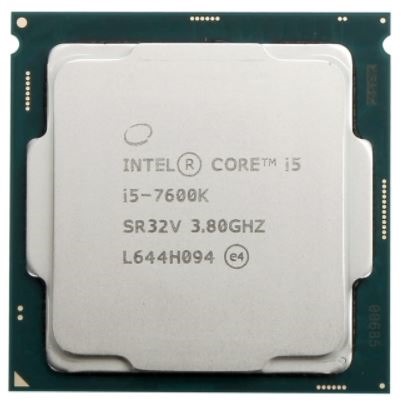
| CPU | Intel - Core i5-7600K 3.8GHz Quad-CoreProcessor | $211.98 @Amazon |
| CPU Cooler | Cooler Master - Hyper 212 EVO 82.9 CFM Sleeve Bearing CPU Cooler | $24.88 @OutletPC |
| Motherboard | Gigabyte - GA-Z270X-Ultra Gaming ATX LGA1151 Motherboard | $158.88 @OutletPC |
| Memory | G.Skill - Ripjaws V Series 64GB (4 x 16GB) DDR4-2400 Memory | $511.99 @ Newegg |
| Storage | Samsung - 850 EVO-Series 500GB 2.5″ Solid State Drive | $174.99 @ Newegg |
| Video Card | EVGA - GeForce GTX 1080 Ti 11GB SC Black Edition Video Card | $724.99 @SuperBiiz |
| Case | Corsair - 330R Quiet ATX Mid Tower Case | $49.00 |
| Power Supply | Rosewill - 600W 80+ Bronze Certified Semi-Modular ATX Power Supply | $58.87 @OutletPC |
| Prices include shipping, taxes, rebates, and discounts | ||
| Total (before mail-in rebates) | $1935.58 | |
| Mail-in rebates | -$20.00 | |
| Total | $1915.58 | |
| Generated by PCPartPicker 2017-08-18 22:19 EDT-0400 |
https://pcpartpicker.com/list/GpFnD8 [Since I built it, I know that this list would work. If I am doing it again, I would get low profile memory, as it was difficult to fix the CPU fan with the these high memory sticks].
GPU
First, what is the right build for GPU computing? The first and foremost is that you need a good GPU. As of writing this note, it is Nvidia 1080 Ti. Here are the reasons why:
- Nvidia is the undisputed leader in GPU computing. While AMD is a good brand, the library support for Nvidia is unmatched. It is well-debugged, with full support for many frameworks.
- Now which card? Within the home buyer’s range, you are looking at GeForce GTX series. The higher the number the better it is. Ti, standing for Titanium offer upto 30% more than the regular version. You can get 970, 980, 980 Ti, 1070, 1080, 1080 Ti -- any of them will work. Realistically, these options stand out:
- 1080 Ti: This is the best one currently. Runs around $700
- 1080: 30% less than the Ti. Runs around $500
- 980: You can get them on Ebay -- if you are lucky, you get it under $150.
I think the best value is for $1080 Ti, if you are a serious player in machine learning. For full details, please visit: http://timdettmers.com/2017/04/09/which-gpu-for-deep-learning/

The GPU GeForce 1080 Ti is available from many vendors like EVGA, MSI, ASUS etc. The main differences are all the brands is:
- Ability to overclock
- Number of fans: Typically most have two fans. Some have 3 fans allowing for higher clock speed. Some even have liquid cooling for quiet operation.
- Connections: Display ports, HDMI or DVI-D’s that these motherboards can connect to.
- Color schemes (don’t laugh -- lot of gamers expose the innards of the machine)
I ended up with EVGA GeForce 1080 Ti SC Gaming edition. There are higher brands like SC2 -- but, they did not offer much more.
CPU + Motherboard
While AMD Ryzen is really attractive now, I opted for Intel. Intel works without any tweaks with all the software we use, including Linux and virtualization. I will use AMD Ryzen someday, but not yet. AMD Ryzen 7 on the higher end can offer 8 cores or 16 threads. It offers great performance, yet the stock Linux does not work with it (the latest kernel does work).
You need to know a few things before buying a CPU. CPUs come in two varieties: the one that can be overclocked and one that can’t be. In the case of Intel, it is Intel K series can be overclocked. In Ryzen it is X series. The current generation of Intel is Kaby Lake (7th generation). The older one is sky lake (6th generation). While there is no major performance difference, I did not find much cost difference either.
The overclocked versions have the advantage of supporting overclocking. I am not sure if needed it. Moreover, the standard version comes with a CPU fan and overclocked version needs a separate CPU fan.
Still my micro center was selling i5-7600K for really cheap. I went with it.
The mother board needs to support the Kaby Lake (7th generation). It also needs to support the GPU length. Other than these two, most are standard. Gigabyte has good reputation of motherboards. I chose this one because it is on sale. Notice the SLI -- that means, it can take two GPU’s, if I want to up the performance later on.
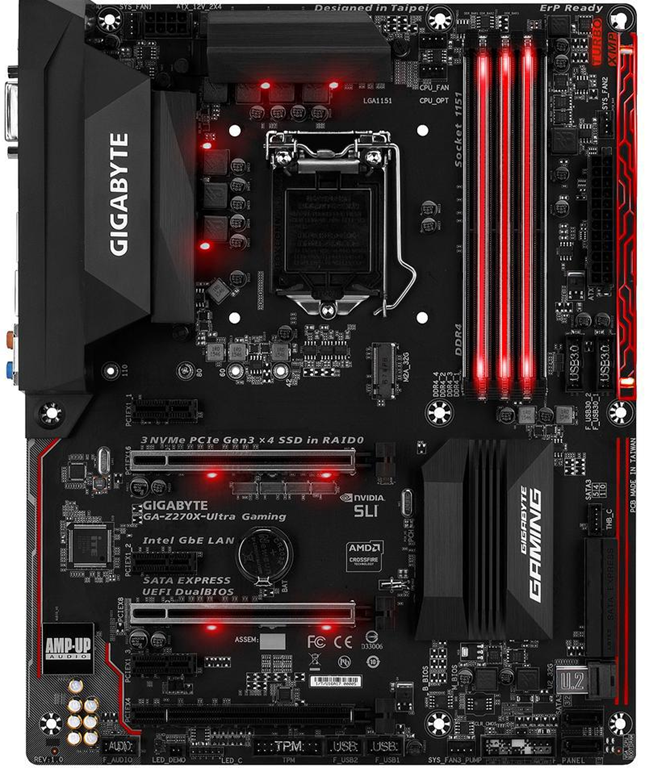
Some motherboards support m2 SSD’s, which are much faster than usual SSD’s. They fit like memory, and act like disks. Still, they are expensive and not yet mainstream. This motherboards supports m2 SSD’s if I need to use in the future.
Case
The other big factor in building a computer is the case. Since you chose ATX motherboard, you are looking for a mid or full case. You also want it to be quiet. You want it to have at least a few fans (like two or three). You want it to have enough space to organize the cables, fit the disks etc. In my case, all I needed was just the SSD hard disk. My priority was a quiet box. I went with Corsair 330R silent case. It has padding on the sides and two fans (with support to add more fans, if needed).
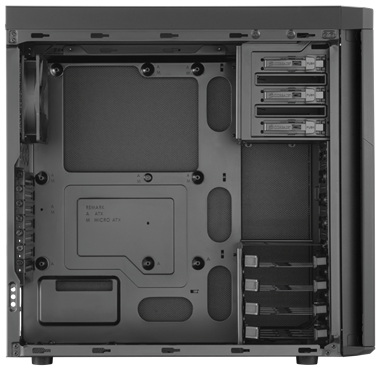
This case does not come with a PSU. I looked for the integrated cases, but did not find any good ones.
PSU
The choice of PSU is largely boils down to these:
- Modular vs. Semi modular vs. non modular: The PSU comes with many power cables. Non-modular PSU has all the cables attached, whether you use them or not. Modular has all the cables as optional. If you don’t use it, you don’t need to clutter the case with attachments. I prefer the semi-modular, with the essential ones already fixed (we do have to power the CPU and motherboard, right?)
- The certification: Any kind of certification here is good. The lowest level 80+ Bronze is good enough for us. This filter weeds out fly-by-night operators.
- The wattage: The PC partpicker will tell you how much power source you need. For the GPU we chose, the recommended wattage is 600W.
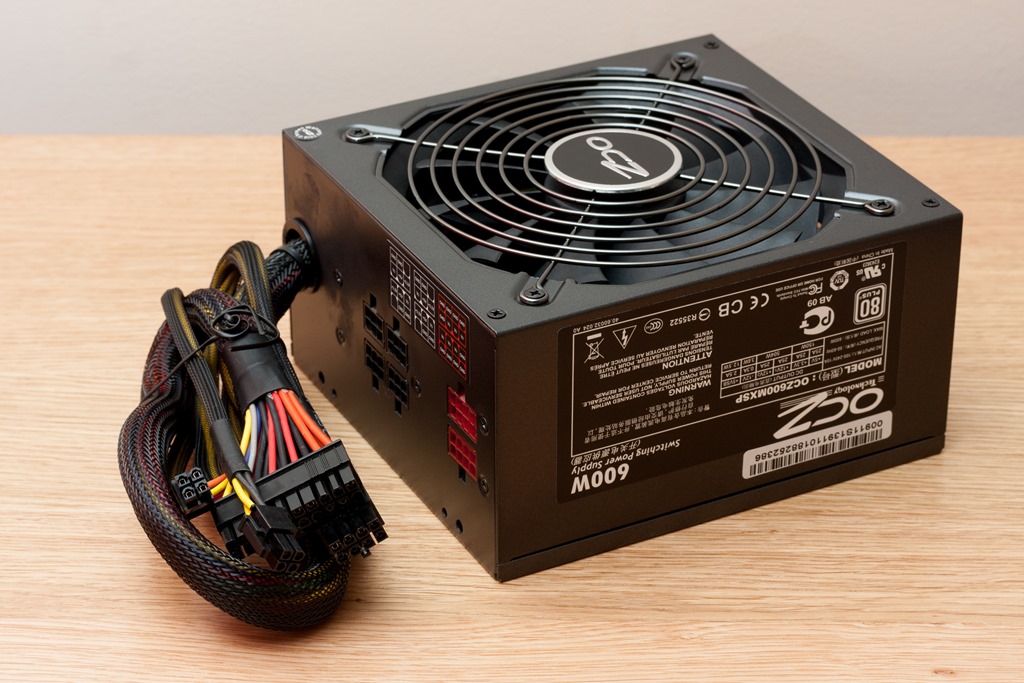
I ended up picking up one from local microcenter that was on sale that meets these requirements. The red one needs to be used for the GPU. Two means, it supports two GPUs. One of them is SATA connector for connecting the disks and optical drive.
Memory
These motherboards can take up to 64 GB. In my experience that is ample, even if you are running many processes. In reality, we will be limited by GPU anyways. This motherboard takes 128pin DIMMS, with speeds from 2400 to 3600. There isn’t much difference in performance, according to the research I did. The difference may be 1% or 2% -- which is not justified in the increase in the cost of 30% of the memory. So, I ended up getting the DDR4 2400. Look for any deals on usual sites.
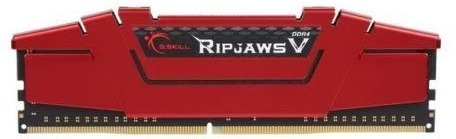
One caveat about memory. The memory goes next to the CPU on the motherboard. It only takes 4 cards -- so, you should get 4x16GB. Our fan sits on top of the CPU, jutting out over the memory. The memory stick I ordered has a cover that forces the fan to move up 5mm. It is not a big deal, but you can order some other memory and save the hassle.
CPU cooler
As I mentioned earlier, the usual non-overclocked version of CPU comes with a fan. I went for the overclocked version only because there was a deal. I ended up having to order a special fan.
What is the deal with a fan? I did not find many differences. For the work we do, for the climate I am in, for the case I have, heat is not a big problem. The case itself has lot of fans too. The higher end ones with liquid cooling are not worth the trouble for me.
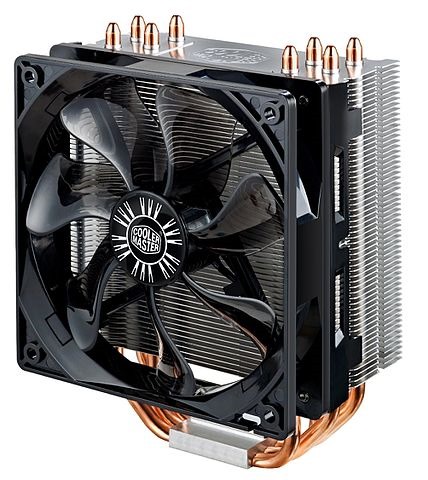
The cooler master Hyper 212 Evo has a large heat sink. It comes with the thermal compound to place the heatsink on the CPU. It has all the attachments required. If you find something good enough on the sale, it should not make much difference.
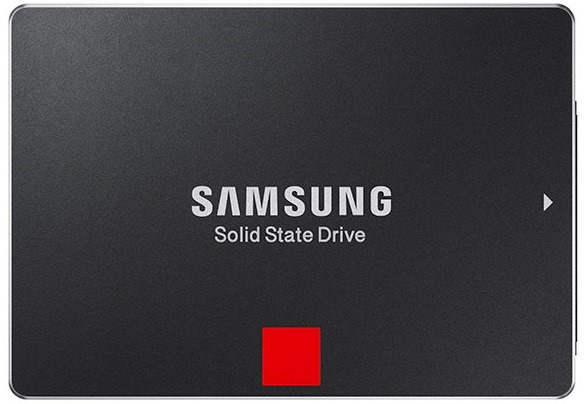
Hard disk
For my need, the choice is between m2 SSD or SATA SSD. The SATA SSD is like a hard disk. The M2 SSD looks like a memory card and sits in one of the slots. It is really fast, but the price is too much for the budget. So, I went with a 500 GB Samsung SSD. This SSD may require some additional hardware to place in the case. But, really speaking it is not needed as long as it is plugged in and placed without the danger of falling down in the case. You can you use a rubber band, for all you care, to fix it in the case. Or, spend $5 and get the attachment to place it in 3.5 bay.
How to buy
Pcpartpicker does the price comparison and tells you where each component is cheaper. Be aware that you have to add taxes to your price on Amazon or your local retailer. Places like newegg or B&H do not collect taxes, though technically you should pay the taxes by yourself end of the year. Surprisingly, I found www.microcenter.com to be the cheapest. It has a retail store in my neighborhood. I managed to pick up the case in open case price, making it really cheap. The CPU+Mobo was on a combo price deal, saving me another $40. Overall, it was cheaper by $120 -- a good 6% than the online companies.
Order all the parts at once so that you can start building immediately. In case there is a problem, it becomes clear immediately. You want to take advantage of one month return policy most merchants have -- so, start building immediately.
Building
I never built a computer. Thanks to Youtube, I found it easy. Here are the
videos I used:
https://www.youtube.com/watch?v=T9pShHlCmLc&list=PLc3lzolCKqOOnVDfa6OpbuYX2f28R-31x
-- this is a three part video series. It makes it really easy to build the PC.
If you want a quick no-nonsense video:
https://www.youtube.com/watch?v=0bUghCx9iso&t=1428s
In any case, here are the steps:
- Install the CPU
- Install the CPU fan
- Install the memory
- Install the motherboard into the case, taking care the back plate is placed snugly.
- Plug the case fans into the motherboard
- Install the graphics card
- Install the hard disk
- Plug the front panel cables into the motherboard
- Put the PSU in.
- Plug the power into the motherboard
- Plug the power into the CPU
- Plug the power into GPU
- Plug the power into the SSD and the front panel (and DVD drive, if you have one).
- Arrange the cables neatly.
- Now, test the case and close the case.
I am not going to describe these steps in detail, as the videos are very descriptive.
After building the computer, check the BIOS. These are the steps you want to do:
- Check if the BIOS recognized all the parts.
- Update the bios, if there is a newer bios.
- Install the OS.
- Update the clock speeds.
I am going to describe installing OS only in a little bit of detail, as it may be instructive:
Installing OS
As you are plugging in the peripherals, you will notice that your monitor can
be plugged into the motherboard or the graphics card. By default, if the card
is there, you should plug into the graphics card.
If you are installing using the flash drive, you would need to change the
booting order. There are some issues installing Linux desktop with XWindows.
Instead, my suggestion is to install Linux server -- which skips the graphical
installation entirely. You can the graphical installation after installing the
drivers. You can use rufus (https://rufus.akeo.ie/) on windows to copy the
ubuntu ISO to a bootable flash drive.
Once you install it, my suggestion is to follow https://blog.nelsonliu.me/2017/04/29/installing-and-updating-gtx-1080-ti-cuda-drivers-on-ubuntu/ -- While I am not able to independently test installation using other methods, this methods worked on my machine.
How does it fare?
I will tell you the full details later. But, for 2K, I have a GPU server for which I need to pay 70c per hr. Assuming that I run it for 8hrs, it is roughly $150 per month. At that rate, it pays for itself in an year and half. Of course, I can run bitcoin mining, and make some real money!
Next part
In the next part, I will tell you how to start with your GPU machine, basic setup, basic tools, and basic steps in GPU computing.